The current pipeline deployment example is based on a Standard Logic App.
I have Build and Release Pipeline.
Build Pipeline
- Create a New Pipeline and give it a name.
- Specify Source, Team Project, Repository and default Branch.
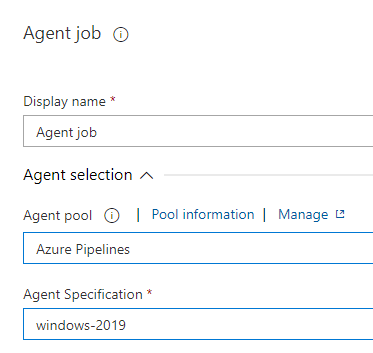
- Specify Agent Job Name and Agent Pool.
- Add an Archive Files task to the Agent Job.
Specify the following:
Display name
Root folder in the repository to archive (containing the Logic App code files)
Archive type as Zip
The archive filename to create.
NB: Be sure to deselect the "Prepend root folder" checkbox. - Add a Publish Build Artifacts task to the Agent Job.
Specify the following:
Display name
Artifact name
Path to Publish and Artifact Publish location should remain as shown below.Congrats, you have now setup your Build Pipeline.Release Pipeline
- Create new release pipeline.
- Add new Artifact.
Select Source type as "Build"
Specify Project.
Select Source (From Build Pipeline)
- Add new Stage, then click on Tasks and select the newly created Stage
- Update Stage name.
- Select Agent Job.
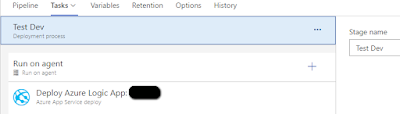
Update Display name, Agent pool and Agent specification. - Add an Azure App Service deploy task to the Agent job.
Update all fields as shown below:
NB: Select deployment method - Zip Deploy - The completed stage should look something like this.
- The completed release pipeline should look something like this.You may now run you build pipeline and thereafter your release pipeline.